
What is your best place to live in ? Seaside, mountains or maybe some far away galaxy ? Lucky for me I could choose anything that you can (and cannot) imagine for my spaceship as an environment to exist in. And this place should be as awesome as my Sparkles.
As you know from my first post, my main inspiration for this project was movie Avatar. So I decide that my environment for Sparkles will resemble that. By this choosing mountains and fog and lots of greenery.
For creating an awesome environment pretty fast and without much pain choose NUKE (pain will be only in paying for it). Nuke is a software for digital compositing. 3D compositing to be precise. It usually used as the last stop in every movie, where every part comes together. You can import all 3D objects, terrain, fog, snow (made procedurally in Houdini) etc and put it together to make it look as real as possible. Or you can cheat and make everything 3D from 2D images. How?
Pure magic !
Nuke has an ability to projects 2D images on the cards and create volume. It tricks viewer and looks pretty real in establishing shots. You can pan, tilt and dolly camera, while your environment from one picture looks as real-life footage.

Lets take a look how I made my own Pandora planet for Sparkles.

I LOVED this image from the first sight. Lights and colors are perfect. Now I will have to match everything else to them.
Basically everything starts with the reference image, which will be your main setup. Then you add up sky and multiple things to the foreground. It’s like layers in photoshop, but here the distance you place layers with plays a crucial role in making everything look realistic. Perspective is a key.
So I usually start with ,taking simple photoshop file. Very rough. But it helps we to figure out what I want to put where and which layers I will have to cut out later.

Here’s my initial concept (it changed a lot in the process). After creating it I could see for myself that there’s a sky layer very far behind my mountains. bridge somewhere in the middle. more close to the camera and very close to the camera on the foreground there are some leaves and bushes.
I started with making a sky. Again Photoshop is the best tool ever. By blending together different layers I created this sky. I used separate image of background, clouds and planets. A little secret (SHHH!) to make blending seamless is using erase brush with very low flow and very high smoothing options. Then you can easily erase all the layers’ borders.

Then I started working with greenery for the foreground. As you can imagine it is veeeryyyy tedious to cut out leaves and trees from the real picture. It will take lots of time and effort and still can look hideous. So I just started looking for png images of different tropical and jungle plants. Anything I could find and then choose from it.

After that I started my fight with the bridge. Which I have have to admit ended up with my failure. Unfortunately I turned out to be extremely tricky to find out a picture of the bridge that has relevant style, positions and is high res. Not only png images are difficult to find, but also all the beautiful pics of the jungle bridges are very difficult to implement. The solution here would be to procedurally model bridge in Houdini and then put it inside. But this is for another blog post …
At this stage I had sky, my main mountains, my leaves for the foreground. Now it’s time for setting up a composition in Nuke.
to make this super cool set up with the mountains I used 3D projection node. The tricky part is to place three cards and a projector in such a way that it projects picture on the cards same angle as pictures were taken with the camera. Also you have to be very mindful with the distance between cards and projector (the further you put them, the bigger you have to make them and it should make perspective look realistic). So after all this projector craziness ends, you just place regular cards for greenery and sky (sky goes as far as you can get it). To make trees look more natural play with vertex of the cards and warp them a bit.
Here you can see how immensely cool setting up this environment looks in 3D:

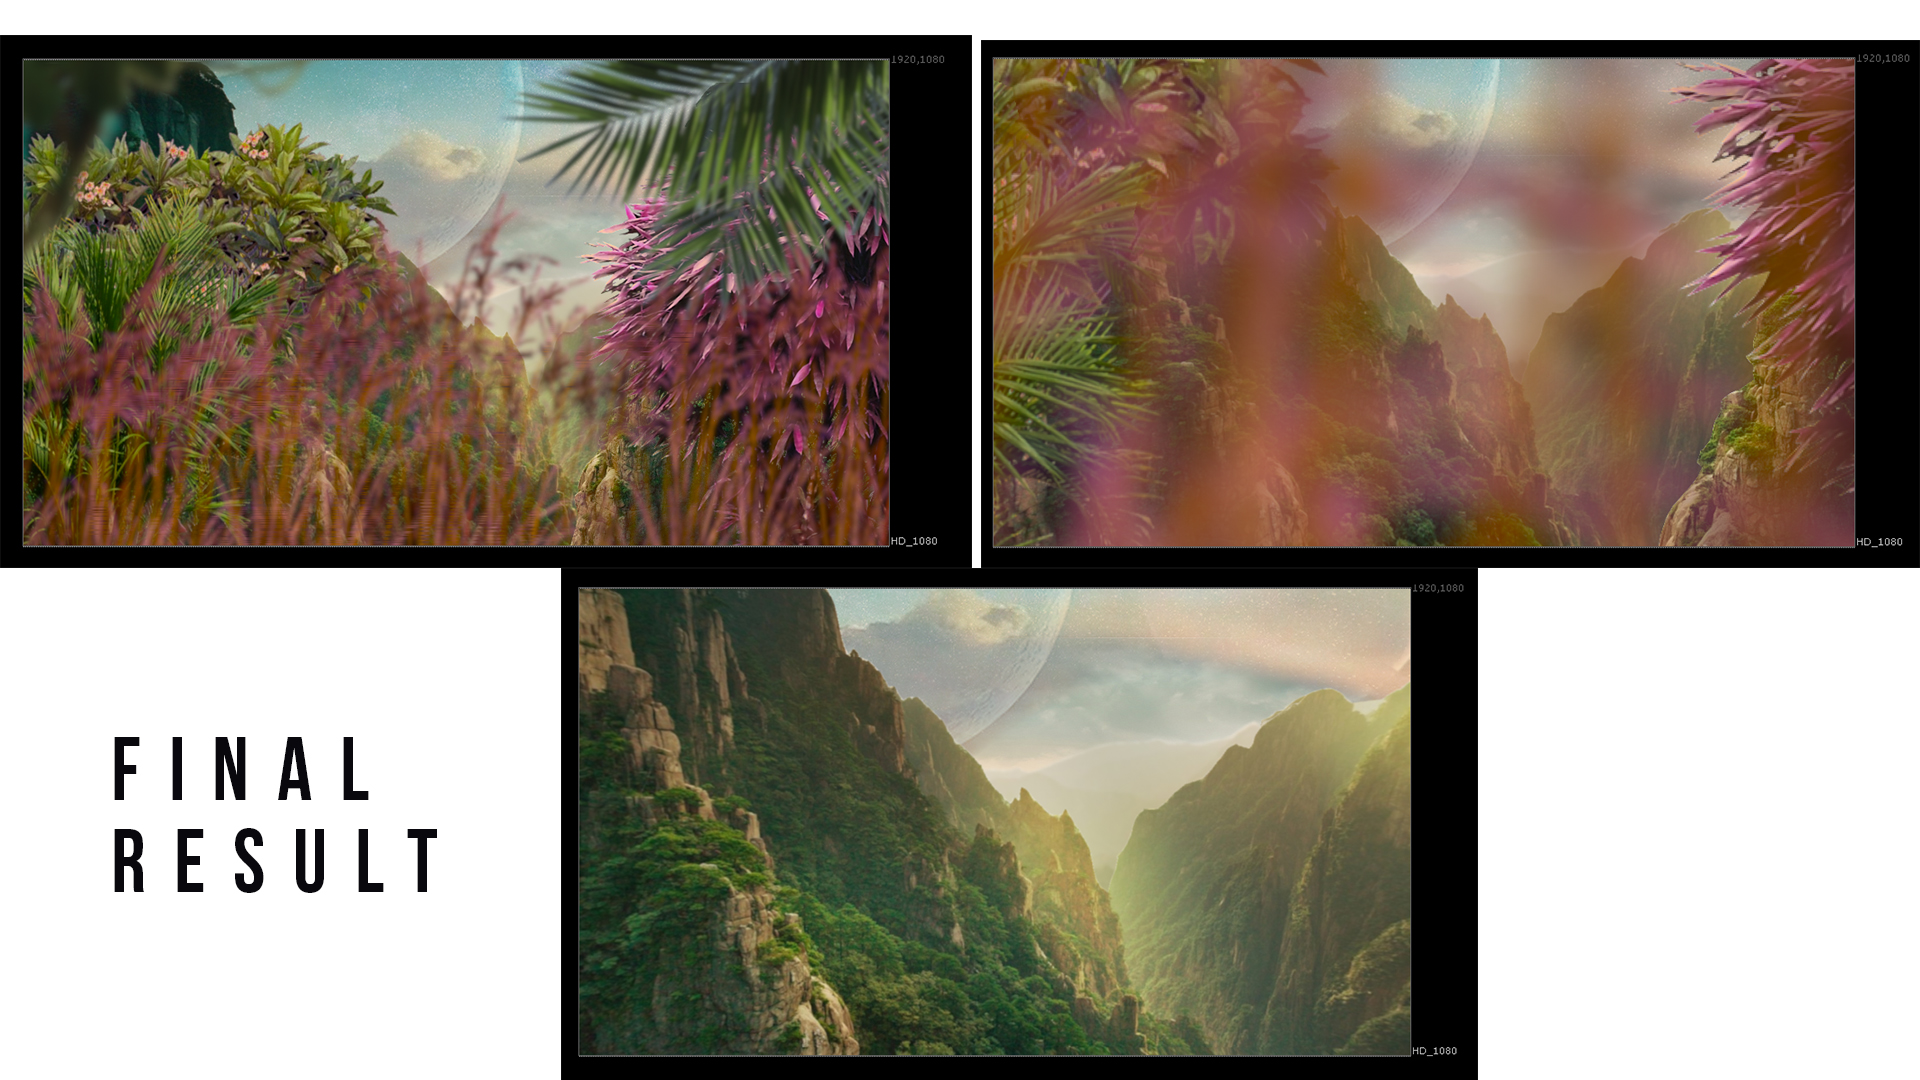
Final step is to tweak the color of the highlights on the images to match yellow soft lights of the background. Also remember rule of the camera – thing that very close are out of focus. So everything that is on the foreground has to be blurred more or less depending how far they are from the camera.
Ta da da dam! Final result. You can see that on the first frame the closest greenery is very out of focus. Camera moves through the grass and we can see gorgeous mountains.

P.S. Keep your work organized (as I did). Group your nodes with the backdrop to not make a huge mess !

NEXT POST ABOUT PRE-PRODUCTION 💻 Why do we need to prepare, prepare and one more time PREPARE ? What is the main CHECK LIST 🔖 ? STAY TUNED !
#OhShipped! #shipped #shippedgbc #ohspippedgbc #vfxblog #vfx #vfxnerd #torontoartist